Well Well Well.. A Well!

Well, I’ve had this well lying around for a couple of years before i finally decided to paint it! I found this and the stables from Forge World in a cheap bundle on eBay, but only just finished this one!

Forge World Well

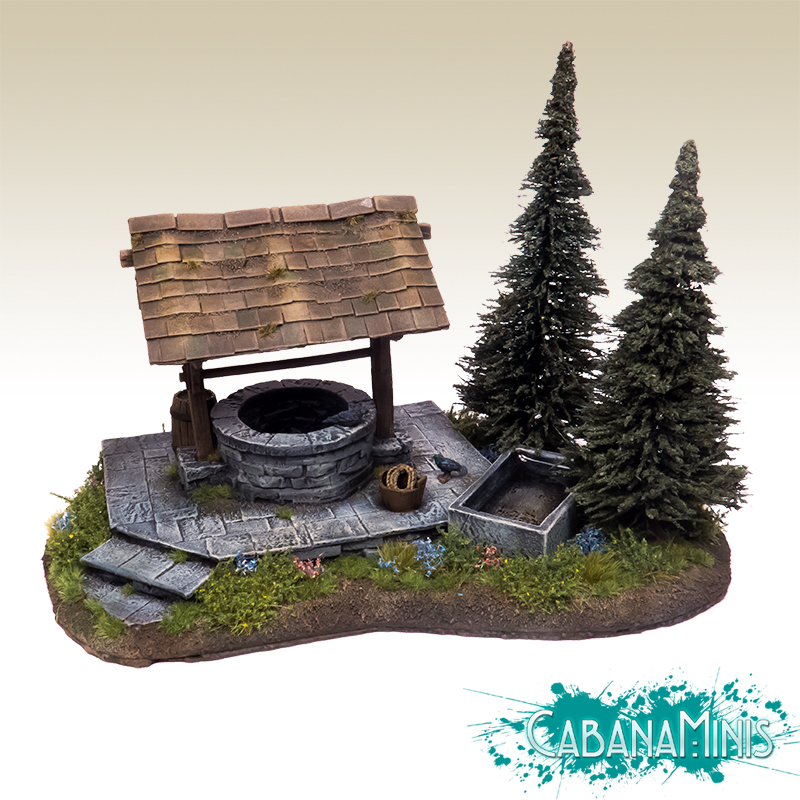
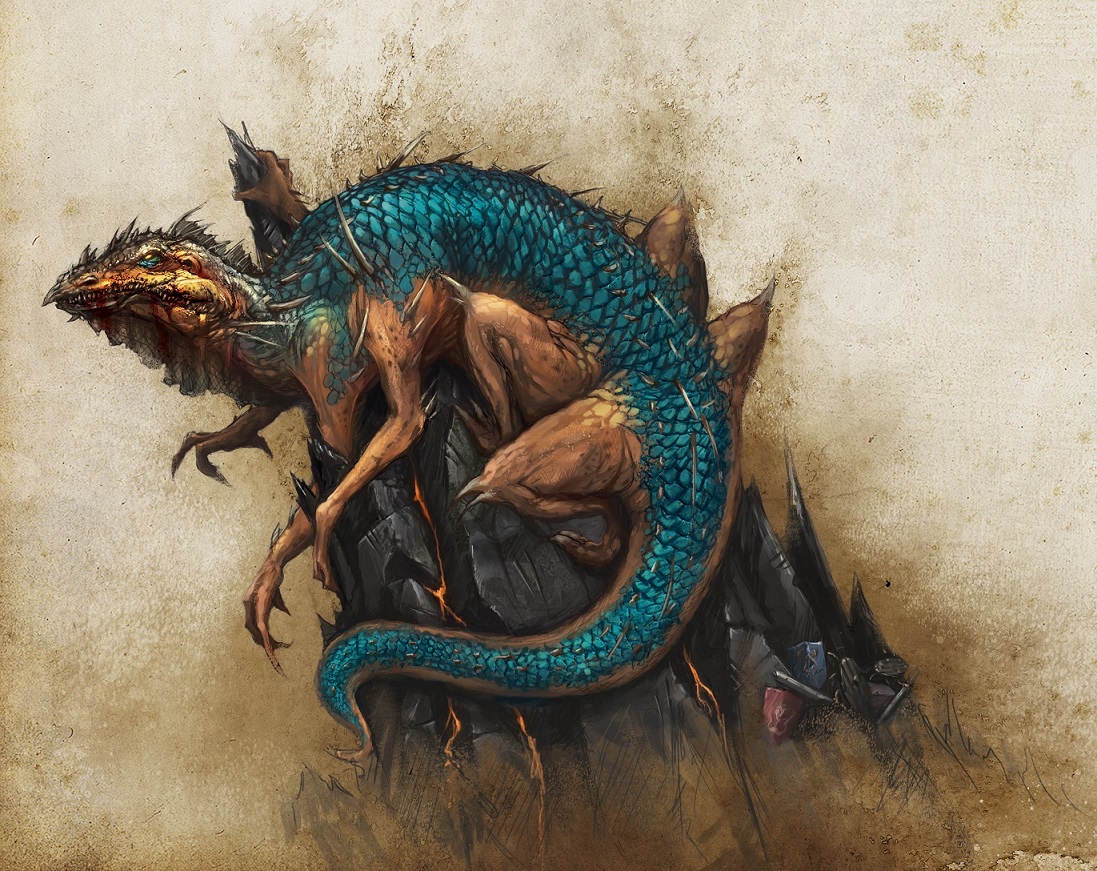
The trees are from a company called Busch. I think it’s smaller scale, but they are rather cheap and they look pretty good even at close-ups. The old Forgeworld resin is very high quality and very dense, and I used so much time filing/sanding the bottom on this and the stables, since they put way too much resin in the mold it seems. Had the same problem with the Carmine Dragon and the Roadside Shrine (all originals of course) but with a lot of excess resin at the bottom.

Forge World Well

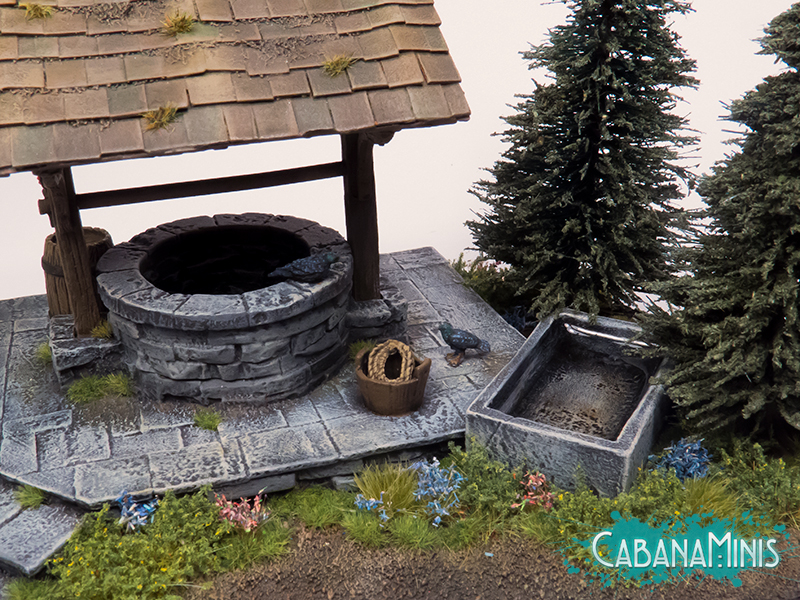
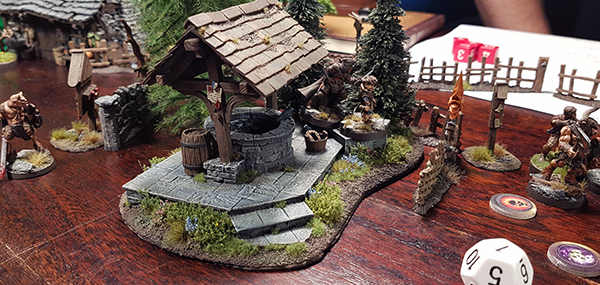
I added a rope from a reaper miniatures adventurer’s kit (the bucket is part of the scenery and attached to the base) and I put 2 ravens which I painted up as starlings. The one on the ground is from Tabletop-Art’s Raven set and the one on the well edge is from Tabletop-World’s Tombstone set.

I used water effects in the watering trough from AK’s Resin Water kit, so it’s ready for any thirsty horse or desperate adventurer (who is too lazy to use the well)

This turned out to be quite a centerpiece for our rural Warhammer RPG sessions! We used it as a midpoint for a beastmen encounter a few sessions back and it was used (with great success) by our rogue Ozzy and his faithful companion Littleton Proudcock (aka P-cock) as a great place to sneak-attack!

Session24

New House and lots of Projects!

Phew, we can now call ourselves House Owners!

Moving into a house wasn’t as fast and easy as we thought! We had to move both our business and our apartment into an old house with lots of plumbing and electricity problems, that made it even harder for us to get our shop up and running again! And on top of all, both my husband and I were hit by a stomach flu for an entire week! So we had to have my parents come up and help ship orders…

And despite a failing heat source (it’s freezing), we are holding up and only missing tables for our work and paint stations! So in a few days I will be able to paint again! And Spring is just around the corner, so hopefully my paints will thaw! :-P

Creepy Basilisk!

I still have a few pictures left from before we moved out, so here is my version of the ForgeWorld Basilisk! I’ve changed my mind so many times with colours on this one, but I decided to go straight for the Monstrous Arcanum description/artwork.

I’m not deeply satisfied with the result, but he looks really cute none the less. Here is the Artwork I based him on:

Basilisk_artwork

I might add some more details on this guy at some point, but for now he sits in our vitrine all pretty :)

Nightmaw – Without Sayl the Faithless

I’ve had this Nightmaw (from Forge World’s Sayl the Faithless) primed and ready to paint for a long time. But recently I decided to do some experimenting and learn how to get better at painting skin and shadows. So Nightmaw was the perfect choice! Instead of his more purple depiction in the Tamurkhan book, he is now used as a Tzeentch Chaos Spawn.
Nightmaw is actually the result of 3 of Sayl’s fellow apprentices being melted together (disgusting, right?)

Nightmaw

I kept the base very clean to highlight the skin on Nightmaw. I had to freehand a lot of the skin, as it was too plain without. But the details on this are amazing! Here he is from a few more angles:

I only used Reaper Paints for this which are “hands down” the best skin paints in the world. The darkest shadow is Tanned Shadow (using the whole triad with Tanned Skin and Tanned Highlight) Then went on to Fair Skin (and the Fair Highlight). I painted bloodshot eyes based with Redstone Highlight (which is perfect for painting lips and soft wounds without looking pink) and Fair Skin Highlight as the brightest (it’s almost white)
The wounds were painted using Imperial Purple and highlighted with Redstone Highlight mixed with the skin colours on my palette.
I used a little bit of Flesh Wash from Vallejo to make the shadows a bit darker. The wash has a very matte finish and is great in small amounts.
Teeth and claws were painted the same way as the skin but highlighted with Khaki Highlights (I always avoid bright white colours, as it gives a very cold and often chalky feel to the miniature)

I spent around two evenings on this one (not including preparations, basing and priming), and he looks really badass in my display cabinet! Oh and his master Sayl is patiently waiting for a paint job on my table (as he has done for the past two years)…

Night Goblin Commander on Giant Squig

After a few days off in total relaxation (On the couch playing Divinity: Original Sin with my husband) I thought it was time to put up a post before returning to work!

Here is the latest addition to my Night Goblins, the champion of the Night Goblin Command group from Forgeworld.

I painted the Squig as having rusty armor with a few pretty additions made by the goblin in command! I also freehanded details on the goblin and highlighted his black robes with dark blue colours. A pretty handsome lad :-)

Oh and I decided not to paint his eyes completely red and just chose a red iris to give him more character.

I will need to find a substitute arm for the bannerman, since I used the banner for my goblin tree-city terrain, which I have been working on for quite a while now :-P

Happy New Year!

Landship Project is Slowly Progressing!

One of my favourite projects (and most time consuming so far) the Marienburg Class Land Battle Ship is slowly coming on, and I recently bought a plinth for it. I actually plan to use it in my WFRP sessions (epic ones indeed!), so I won’t be permanently mounting it. The plinth is LARGE, and I first thought about making a scenery base on top of the plinth, but something tells me it will take a while. Already put more than 50 hours into the ship alone which is far from finished!

Here is the plinth in its “nude” form :-P

Ship Plinth

And here it is with what little of the ship I have completed! The missing parts are almost fully painted but I am missing the shield crests as I haven’t finished the colours yet. Oh, and obviously the mast and 7 crew members whose uniform colours I am breaking my brain over! The ship looks a little small for the plinth, but the sides and front (including figurehead) is yet to be attached :)

Ship WiP

The wheels were excruciating to paint and I really wish I had an airbrush for it! I really wanted the ship a bit toned down, so no shiny metal parts on the wheels. I used black and blue/grey highlights instead. Let’s see how that works out :-)

Stay tuned for more updates! I hope to finish the ship in 2016, but you never know! Atleast I have finished the Tabletop World Gate :-D

Travelling Empire Merchant

A little month ago I made a post about a Forge World miniature that I had converted into a travelling merchant a character that fits right into the Warhammer universe – He’s carrying a bunch of junk he’s hoping to sell. You can see the WIP post here: WIP: Travelling Empire Merchant

I finished painting the miniature recently and I’m very happy with the result. I’m sure he’ll often be taken out to stroll the streets in our WFRP sessions.
With all the extra details added to the miniature he did end up taking quite some time to finish – but for a unique model I don’t mind it at all :-)

The Pictures

I’ve included 6 pictures to showcase all the various junk the poor guy is carrying around on his back.

WIP: Travelling Empire Merchant

I decided to convert a Forge World miniature (Manann’s Blade musician) to a Travelling Empire Merchant – I spent a while adding LOTS of parts, you can’t actually see it that well in the pictures how much I added, but it’s a lot! He’ll be used in the WFRP campaign, so expect to see him painted soon :-)

EDIT: The Finished merchant can be seen here